Showing posts with label rug. Show all posts

4/24/24

Yarn Over TShirt Rug

 I want to save this..  https://moralefiber.blog/2016/04/03/2298/comment-page-1/#comment-445

T-Shirt Rug Tutorial

APRIL 3, 2016

This was the fourth crocheted t-shirt rug from this series that I posted a while ago, in which I allude to the method but don’t provide much of an explanation.

Here’s how to make T-shirt yarn via Endlessly Inspired.

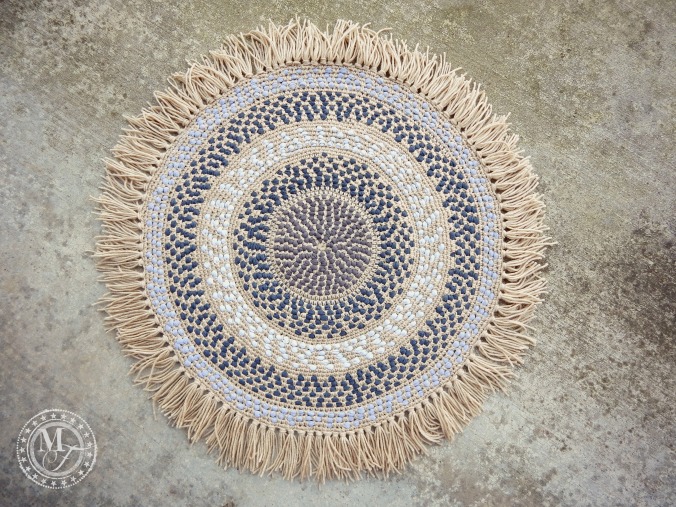
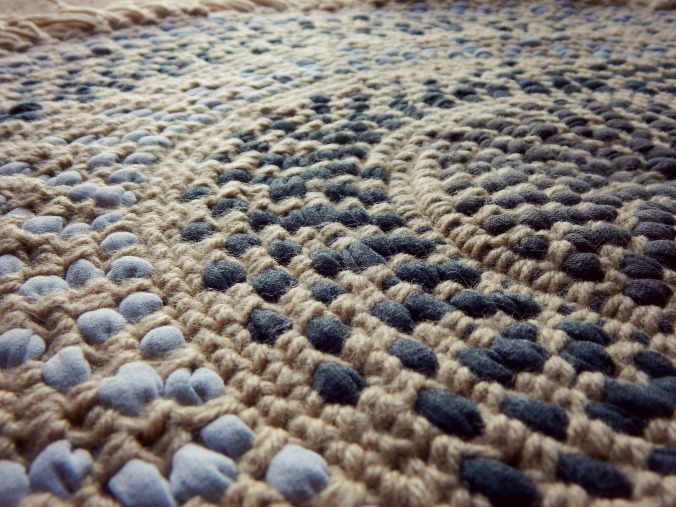
I got the idea of using yarn to crochet around the t-shirt strips from Pinterest (of course) but felt that I could make things a little more interesting by experimenting with stitch designs..MerryPrankster2…. which was fun, but sometimes one desires a more mindless exercise. So I experimented with ducking the t-shirt yarn strip in front of and behind the stitch, and came up with a design that makes the strip form  eye-pleasing rings of bobbles or nubs, or in the case of my most recent rug, stones on sand.

StonesonSand5

Crocheting around the T-shirt yarn in this way is soooooo much easier, neater-looking, and more economical  than trying the crochet the t-shirt yarn itself. I always make my own t-shirt yarn, so it’s also better because it’s easy to switch from one ball to another with this method.

Crocheted T-shirt Rug How-To

DSCN4267

UPDATE 3/2020: I now have a video on my YouTube Channel that demonstrates this technique.

You need:
A large amount of cotton or acrylic yarn (A skein of Caron One Pound usually gets the job done nicely, with some to spare)
T-shirt Yarn (I use home-made, but store bought works too!)
A 6.00 mm hook
Start by making a magic ring. 6 sc into the ring tightly. Sc into the first sc of the first round to begin a joinless, in-the-round crochet circle. *
*I will not be giving instructions for increases in the round because I’m making the assumption that the crocheter already knows how to handle this – just work them in the same proportion as you usually would or decide how many you need to keep it flat as you go. 
In the second round of stitching, hold the t-shirt yarn flat against the last row and start to stitch the single crochet over the tail of this yarn until you have worked 3-5 stitches or have anchored it securely. Once you have secured the t-shirt yarn, you will begin weaving it in and out of the sc stitches.
DSCN4483
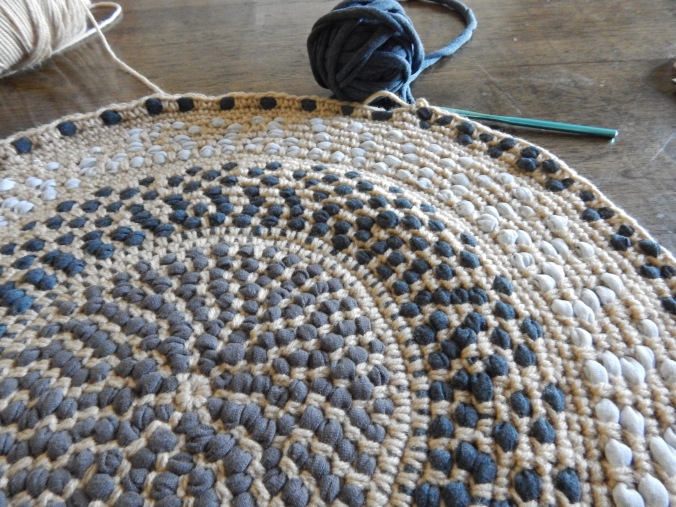
This isn’t a picture of the second round, but you can see where I have begun the new strip by anchoring it within the sc stitching before I start weaving it in and out.

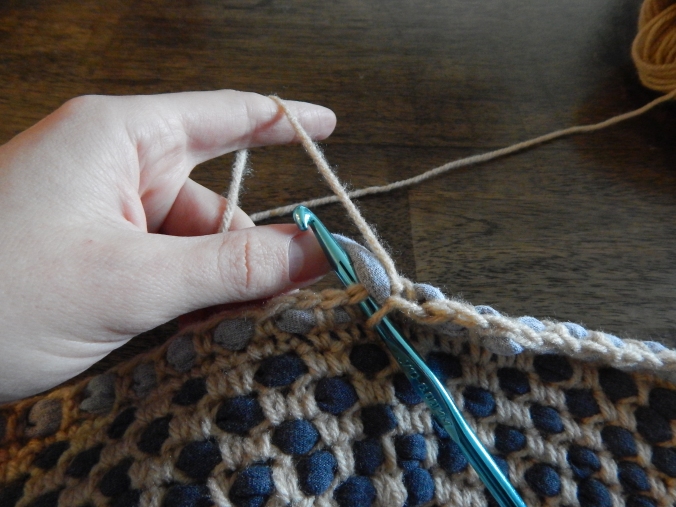
Continuing to work in the round (and adding increases where necessary), hold the t-shirt yarn to the back of your work and work a sc in the next stitch. Keep in mind that the t-shirt yarn should be completely to the back of the work so that the yarn is not held within the stitch at all.

*Tightening the sc after working it by holding the loop steady and pulling on your working yarn makes the rug nice and firm and helps the t-shirt yarn bobbles look neat.

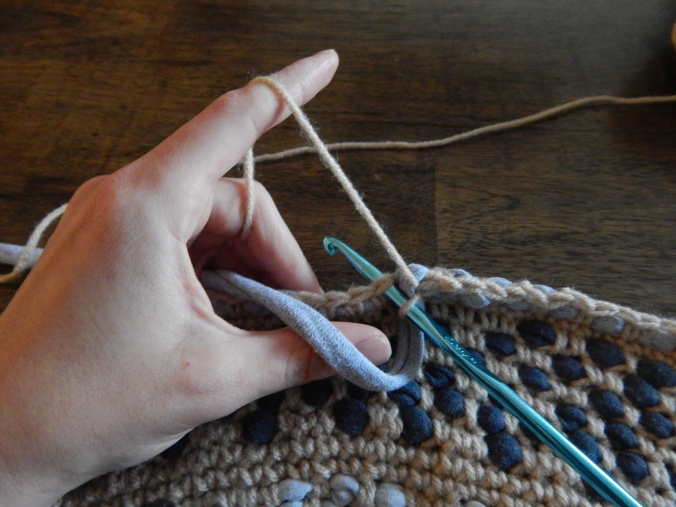
Before you work the next stitch, bring the t-shirt yarn completely to the front of the work, so that you are working your next sc behind the t-shirt strand.

DSCN4490

Work the next sc, tighten it down if necessary, then return the t-shirt strand to the back of the work – this will wrap the t-shirt yarn around the stitch you just made, creating a little t-shirt bobble.

With the t-shirt yarn at the back, make another sc in the next stitch.

DSCN4493

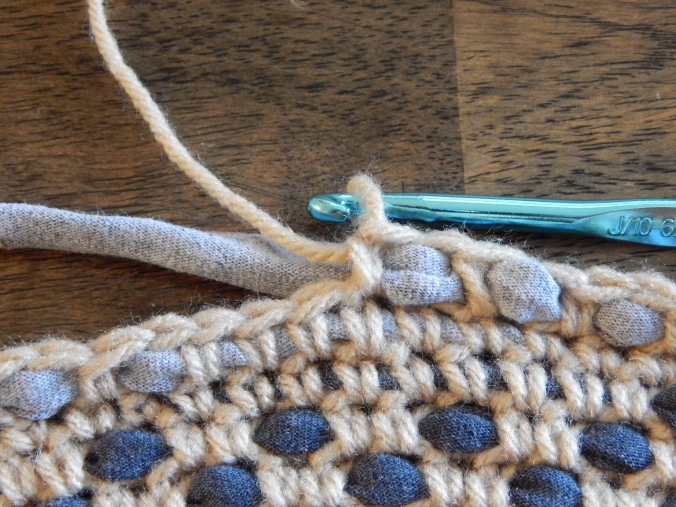
Continue alternating holding the t-shirt yarn in front or back, until you get near the end of the strand or decide to change colors. Return the t-shirt yarn to the top of your work and work a series of several sc stitches OVER the yarn, so that it is trapped in the stitch again. Do this until the end is reached, then begin the next strand the same way.

I like to vary the proportion of bobbles in the front (i.e – bring the t-shirt yarn to the front every two stitches, every three stitches, etc) to provide visual interest, or alternate rounds of bobbles with rounds of t-shirt yarn carried along inside openwork stitches.

T-Shirt Yarn Rug Video Demo:

UPDATE 3/2020 & 9/2020: I did eventually make a video guide/tutorial for how I make these rugs! It covers the basic strategies of how I start the rugs in Part 1 (following the basic increases formula to produce a flat circle and then adding in the yarn and crocheting around it) and then how to finish a unique rug in Part 2 (goes over the tricks I use to freeform the outer rings of the rug to create decorative stitching).

TShirt Rug Crochet Tutorial https://youtu.be/mVjq-cZbbqY

TShirt RUg Tororial Part 2 https://youtu.be/bAydCORj4LY

5/23/17

Yarn Over TShirt Rug


I found this on https://moralefiber.blog/2016/04/03/2298/


Yarn Over T-Shirt Rug Tutorial


Here’s another project that fits firmly into the “tired of staring at it because it’s been sitting on my desk for over a year so I might as well finish it” category!
StonesonSand2
There’s no real reason that it took me so long to finish, other than I got continuously distracted by other projects and lost my momentum on it. It was the fourth crocheted t-shirt rug from this series that I posted a while ago, in which I allude to the method but don’t provide much of an explanation. Today I am remedying that!
But FIRST! Here’s how to make T-shirt yarn via Endlessly Inspired.
I got the idea of using yarn to crochet around the t-shirt strips from Pinterest (of course) but felt that I could make things a little more interesting by experimenting with stitch designs..
MerryPrankster2…. which was fun, but sometimes one desires a more mindless exercise. So I experimented with ducking the t-shirt yarn strip in front of and behind the stitch, and came up with a design that makes the strip form  eye-pleasing rings of bobbles or nubs, or in the case of my most recent rug, stones on sand.
StonesonSand5
Crocheting around the T-shirt yarn in this way is soooooo much easier, neater-looking, and more economical  than trying the crochet the t-shirt yarn itself. I always make my own t-shirt yarn, so it’s also better because it’s easy to switch from one ball to another with this method. So enough talk… how is it done?
Crocheted T-shirt Rug How-To
DSCN4267
You need:
A large amount of cotton or acrylic yarn (A skein of Caron One Pound usually gets the job done nicely, with some to spare)
T-shirt Yarn (I use home-made, but store bought works too!)
A 6.00 mm hook
Start by making a magic ring. 6 sc into the ring tightly. Sc into the first sc of the first round to begin a joinless, in-the-round crochet circle. *
*I will not be giving instructions for increases in the round because I’m making the assumption that the crocheter already knows how to handle this – just work them in the same proportion as you usually would or decide how many you need to keep it flat as you go. 
In the second round of stitching, hold the t-shirt yarn flat against the last row and start to stitch the single crochet over the tail of this yarn until you have worked 3-5 stitches or have anchored it securely. Once you have secured the t-shirt yarn, you will begin weaving it in and out of the sc stitches.
DSCN4483
This isn’t a picture of the second round, but you can see where I have begun the new strip by anchoring it within the sc stitching before I start weaving it in and out.
Continuing to work in the round (and adding increases where necessary), hold the t-shirt yarn to the back of your work and work a sc in the next stitch. Keep in mind that the t-shirt yarn should be completely to the back of the work so that the yarn is not held within the stitch at all.
*Tightening the sc after working it by holding the loop steady and pulling on your working yarn makes the rug nice and firm and helps the t-shirt yarn bobbles look neat.
Before you work the next stitch, bring the t-shirt yarn completely to the front of the work, so that you are working your next sc behind the t-shirt strand.
DSCN4490
Work the next sc, tighten it down if necessary, then return the t-shirt strand to the back of the work – this will wrap the t-shirt yarn around the stitch you just made, creating a little t-shirt bobble.
With the t-shirt yarn at the back, make another sc in the next stitch.
DSCN4493
Continue alternating holding the t-shirt yarn in front or back, until you get near the end of the strand or decide to change colors. Return the t-shirt yarn to the top of your work and work a series of several sc stitches OVER the yarn, so that it is trapped in the stitch again. Do this until the end is reached, then begin the next strand the same way.
I like to vary the proportion of bobbles in the front (i.e – bring the t-shirt yarn to the front every two stitches, every three stitches, etc) to provide visual interest, or alternate rounds of bobbles with rounds of t-shirt yarn carried along inside openwork stitches.
DSCN1349
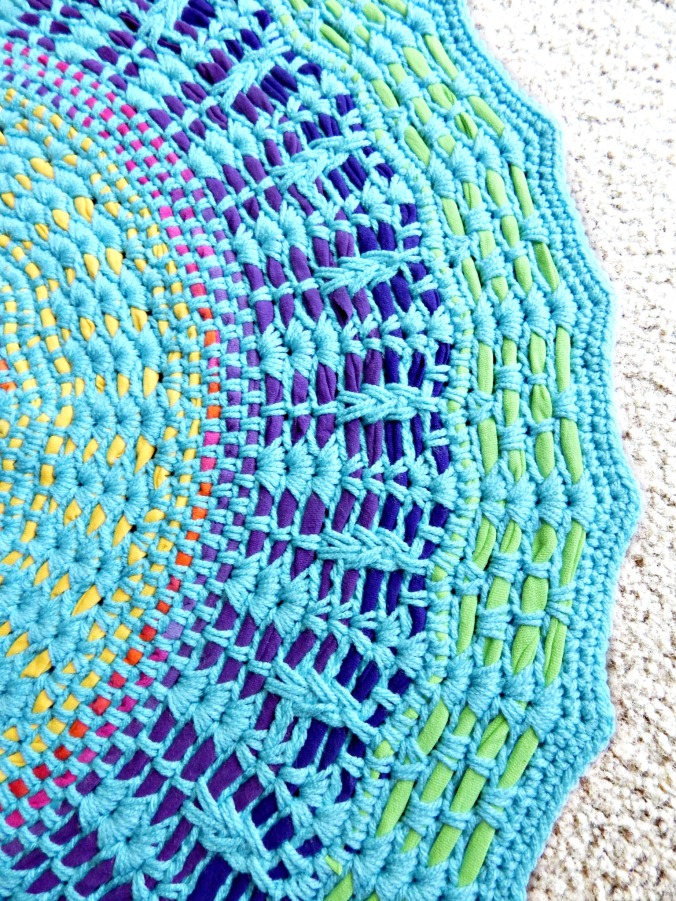
T-shirt yarn carried inside openwork stitches (granny blocks in this case)
As I’ve mentioned before, carrying T-shirt yarn along while you crochet regular yarn is a lot easier on your hands than trying to crochet the t-shirt yarn itself!  And this way, there’s tons of variations you can try.
My rugs usually end up being somewhere between 32-45″, for use as small accent rugs or even table centerpieces (and if you use all cotton materials, really awesome hotpads are possible!)

9/19/16

Oval Rug

Found at http://www.antiquecrochetpatterns.com/oval-rug.html


REQUIRED MATERIALS
AMERICAN THREAD COMPANY "AUNT LYDIA'S" HEAVY RUG YARN, Article 235 9 Skeins Gray
2 Skeins White (or colors desired).
Aluminum Crochet Hook Size H
NOTE(s)
Rug measures 23 inches x 37 inches without fringe.
STEP-BY-STEP INSTRUCTIONS
With Gray, ch 40, 3 s c in 2nd st from hook, 1 s c in each of the next 37 sts of ch, 3 s c in last st, working on other side of ch, 1 s c in each of the next 37 sts, do not join this or the following rounds, place a marker at beginning of each round.
2nd Round. Work 1 s c in each s c on sides and 2 s c in each of the 3 center s c at each end.
3rd and 4th Rounds. Work 1 s c in each s c on sides and 2 s c in each of the 6 s c at each end (110 s c).
5th Round. Start to carry yarn in back of work, * with Gray 1 s c in each of the next 5 s c, with White 1 s c in each of the next 5 s c, carry the Gray yarn under the White sts and the White yarn under the Gray sts, repeat from * all around, drop White. When changing colors always complete last half of st with next color. Yarn is carried underneath in pattern rounds only. 6th Round. With Gray 1 s c in each s c on sides, increasing in every other s c of the 12 sts at each end.
7th Round (Pattern Round). 1 s c in each s c working 5 White s c in center 5 sts between the White groups of previous pattern round.
8th Round. With Gray 1 s c in each s c on sides and increasing in every 3rd st of the 21 sts at each end (7 increases at each end).
9th Round. Same as 7th round, cut White.
Next 6 Rounds. With Gray 1 s c in each s c on sides and increasing a sufficient number of times on each end to keep work flat and having a number of s c divisible by 10 on last round.
16th Round. Work in same manner as 5th round but reverse the order of colors.
17th Round. With Gray work 1 s c in each s c on sides and increasing a sufficient number of times at each end to keep work flat.
18th Round. Same as 7th round.
19th Round. Same as 17th round.
20th Round. Same as 18th round.
Next 6 Rounds. Same as 17th round but having a number of s c divisible by 10 in last round.
Repeat the last 11 rounds once, then work 2 more rounds in Gray, sl st in each of the next 3 s c to even round, cut yarn.
Fringe
Wind yarn over a 4-inch cardboard, cut one end. Using 1 strand, double in half, loop through s c, draw ends through loop tightly. Repeat in each s c having 2 strands Gray, 1 strand White all around.
- See more at: http://www.antiquecrochetpatterns.com/oval-rug.html#sthash.E9sfjZcF.dpuf

6/18/14

Crochet Tshirt Rug

Crochet T-Shirt Rug
This is a post that I found on One Dog Woof. http://www.1dogwoof.com/2012/08/crochet-rug-from-t-shirts.html

I have tried making a rag rug before but never finished it because I ran out of scrap matieral to finish it.  I was using old bed sheets and material scraps and I didn't want to go buy more material.

But I thought this would be a great way to use the scraps when you get done with a t-shirt quilt.

I want to do this in a oval or a rectangle.  I also think this would be a great Christmas gift for the girls.
Repurposed T-shirt Rug

Step 1.  Acquire fabric.  In this case, I used XXL men’s t-shirts from Goodwill.  Choose t-shirts that are mostly or 100% cotton, and have no or very little print on them, preferably, only above the arm line.  You’ll also want the fabric weight to be fairly consistent

Step 2. Create your yarn.  There are oodles of t-shirt yarn tutorials out on the internet.  Feel free to choose any one of them, or try this one on for size.  Cut the shirt below the arm line and below any print (hence the no or little print rule).  Fold the t-shirt from one side to the other side but leave it about 1 inch short from actually meeting ends – this is your 1 inch allowance.  Now cut the t-shirt into 1.5 inch strips, avoiding the 1 inch allowance.  Thicker strips will give you thicker yarn.  Thinner strips give you thinner yarn.  Don’t cut too thin, or the yarn won’t form.  Open up the shirt to see your 1 inch allowance.  Cut starting from the hem, on a slant, from 1 strip to the next across the allowance – this connects all the strips together.

The basic idea is that the shirt is already in the round, so you’re cutting a continuous strip from the bottom hem up to the armpit.  Actually, remove the hem before cutting – it doesn’t curl well (or, at all).  Once you have the big strip, stretch the strip and allow the knit in the t-shirt to curl in on itself, thus creating the yarn.
Repurposed Rug Using T-shirt Yarn

Step 3. Ball up your yarn.  This is actually pretty important, but once I started to crochet, I realized I twisted the yarn as I balled it, so there was a lot of tension.  I ended up unraveling the whole darn thing before crocheting, which kind of defeats the purpose of balling it up in the first place.
Crochet Rug using Repurposed T-shirts

Step 4. Crochet.  I used a single crochet here for a dense weave.  You’ll be crocheting in the round, so start either with a magic circle or the Chain 2 method.  Both are described in this post.  For a quick look at the single crochet, head over to this post, or check out the other crochet tutorials I have!

I used the largest crochet hook I had on hand, which was a size Q and started with 6 SC in the first round, doubled it to 12 in the second round, and slowly increased by multiples of 6 beyond that.  In retrospect, I think I would also try starting with 4, doubling to 8, and then actually counting my way around.

1st round: 6 SC
2nd round: 2 SC in each stitch (12 stitches)
3rd round: *1 SC in next stitch, 2 SC in next stitch, repeat from * (18 stitches)
4th round: * 1 SC in next 2 stitches, 2 SC in next stitch, repeat form * (24 stitches) and so on.


Use Old T-shirts to Crochet a Rug

Or, you can be like me and just make it up as you go, increasing as necessary to keep the piece flat.  If the work is curling up, you need more stitches in the round.  If the work is ruffling, you can either take it apart and not increase as many stitches, or do a round with no increases, sort of to bound the problem.  I also tried to alternate where I made the increases so as to keep a circle shape.  I’ve noticed that if I increase in the same spot each round, I end up with a polygon instead of a circle because of the bulge that extra stitch makes.

When you run out of a particular shirt, tie it to the next shirt with a small knot and keep going.  When you’ve come to your desired size, or to the end of your t-shirt stockpile, pull the end through the last loop and pull tight.  Then weave in your ends.