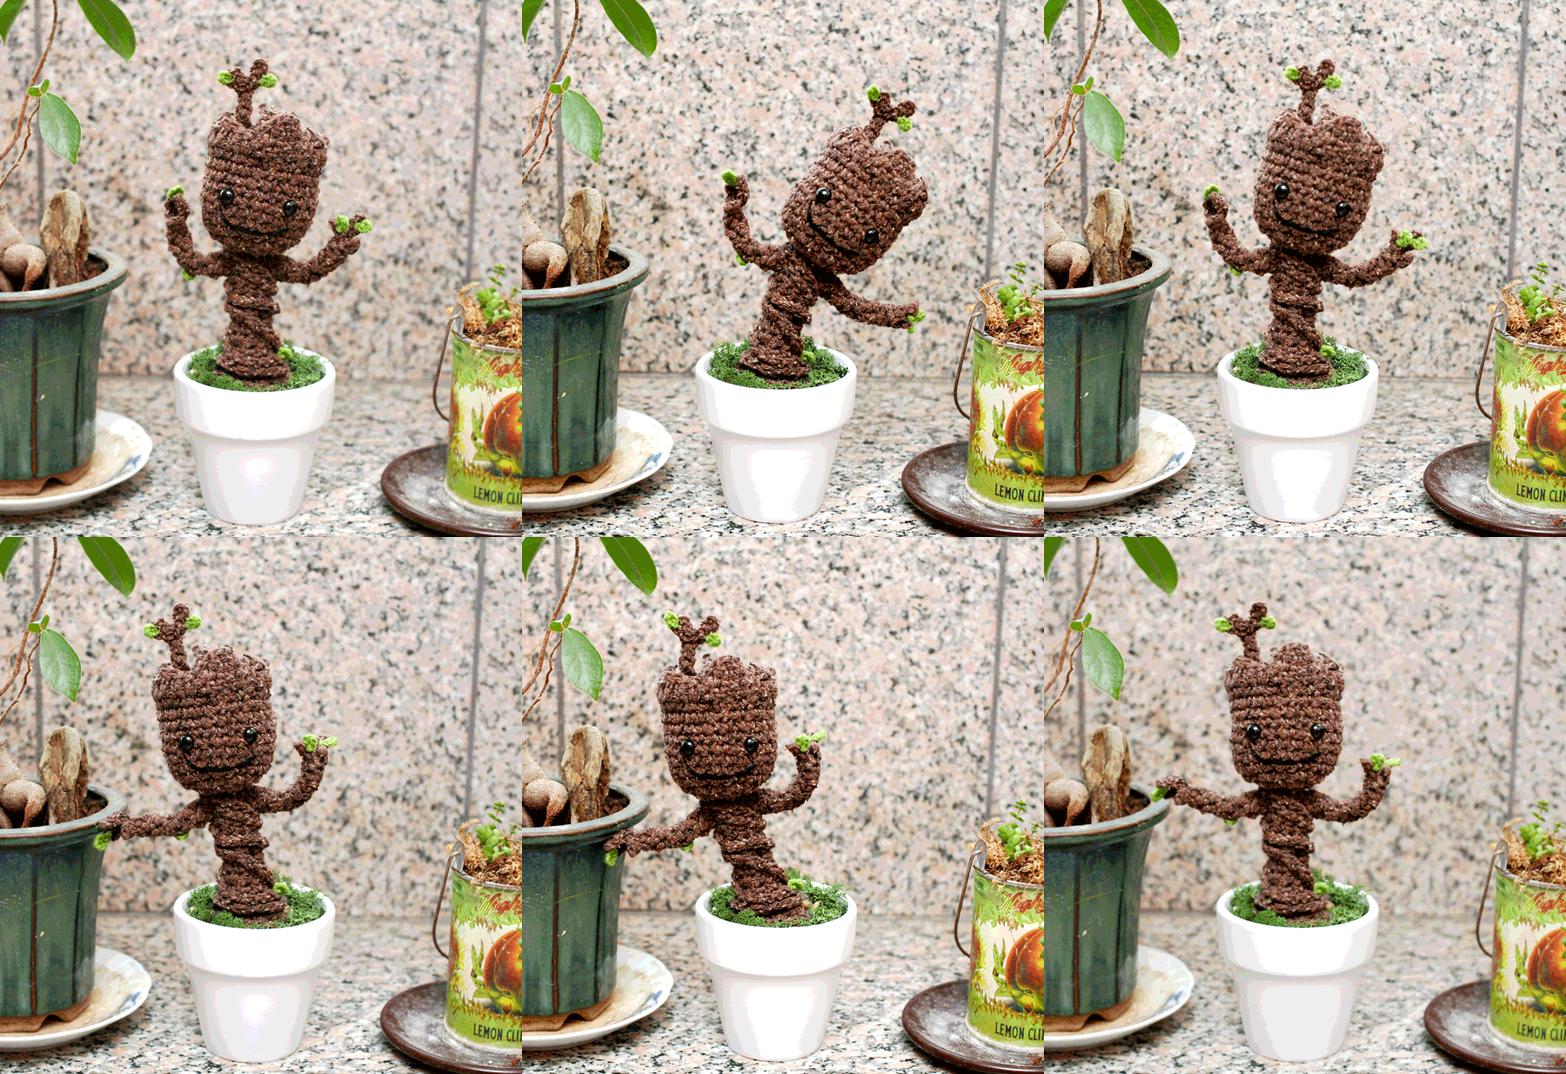
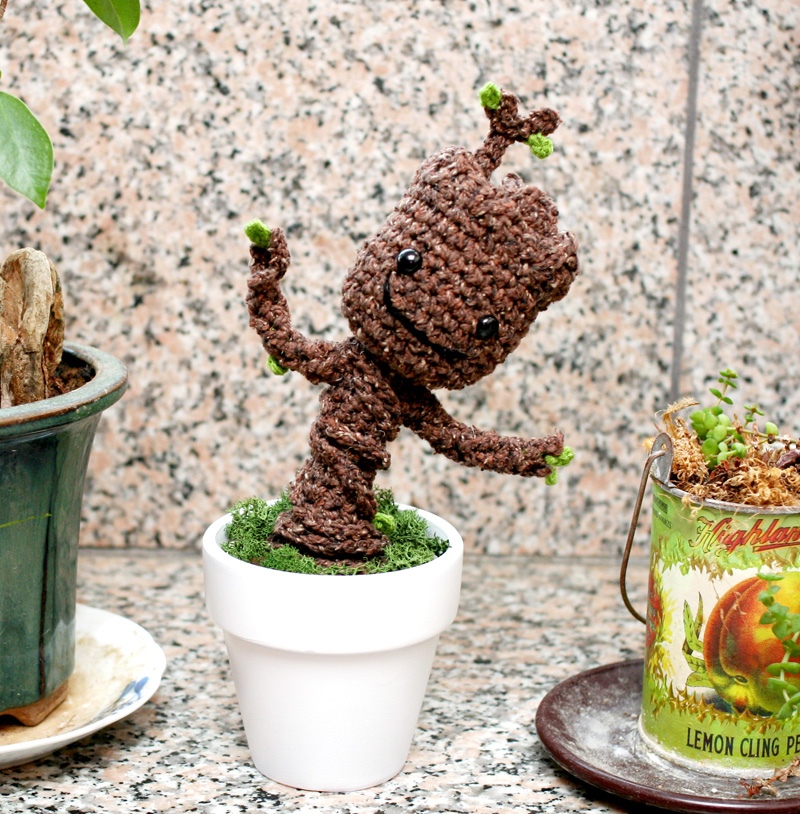
(You have to watch this .gif while
listening to Awesome Mix Vol.1) I saw Guardians of the Galaxy last weekend because Manda and our friend Ehren both wanted to see it. A lot of my friends have been over the moon about it, but I’m really not a comic book person, and the trailer wasn’t really catching my attention. I said I would see it if someone bought my ticket :P.
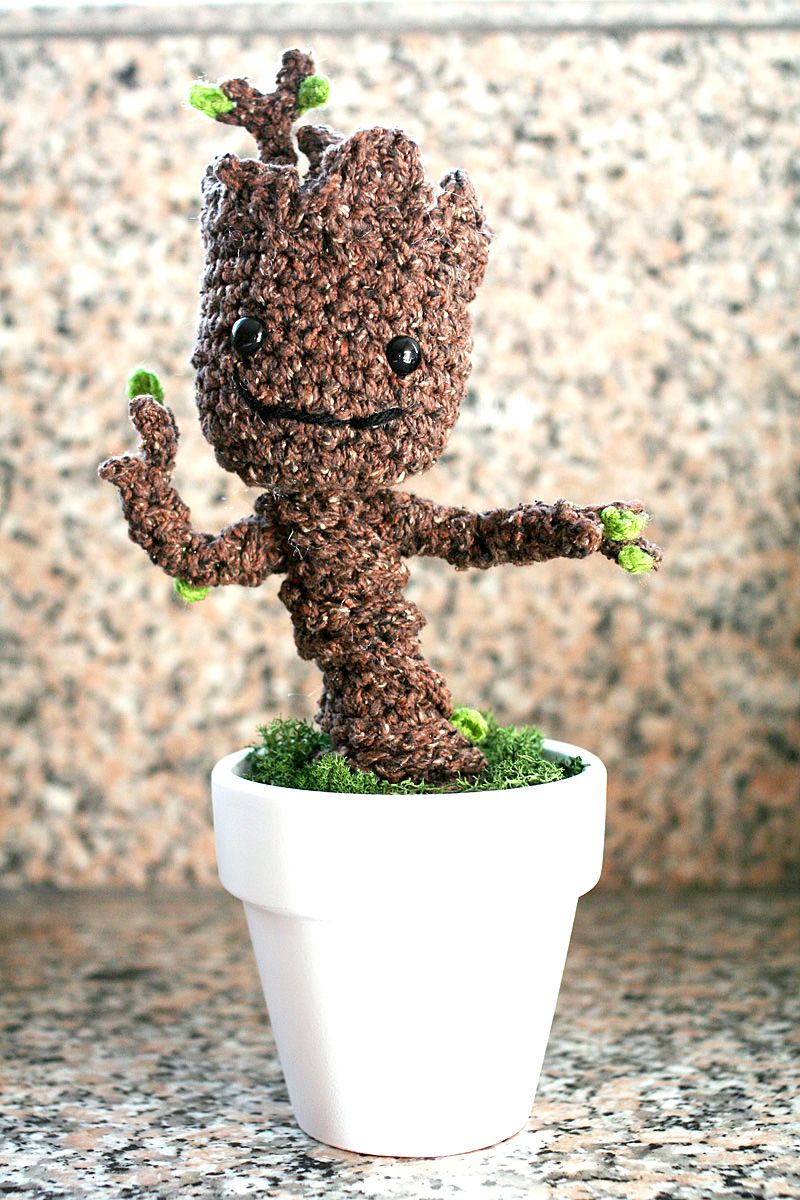
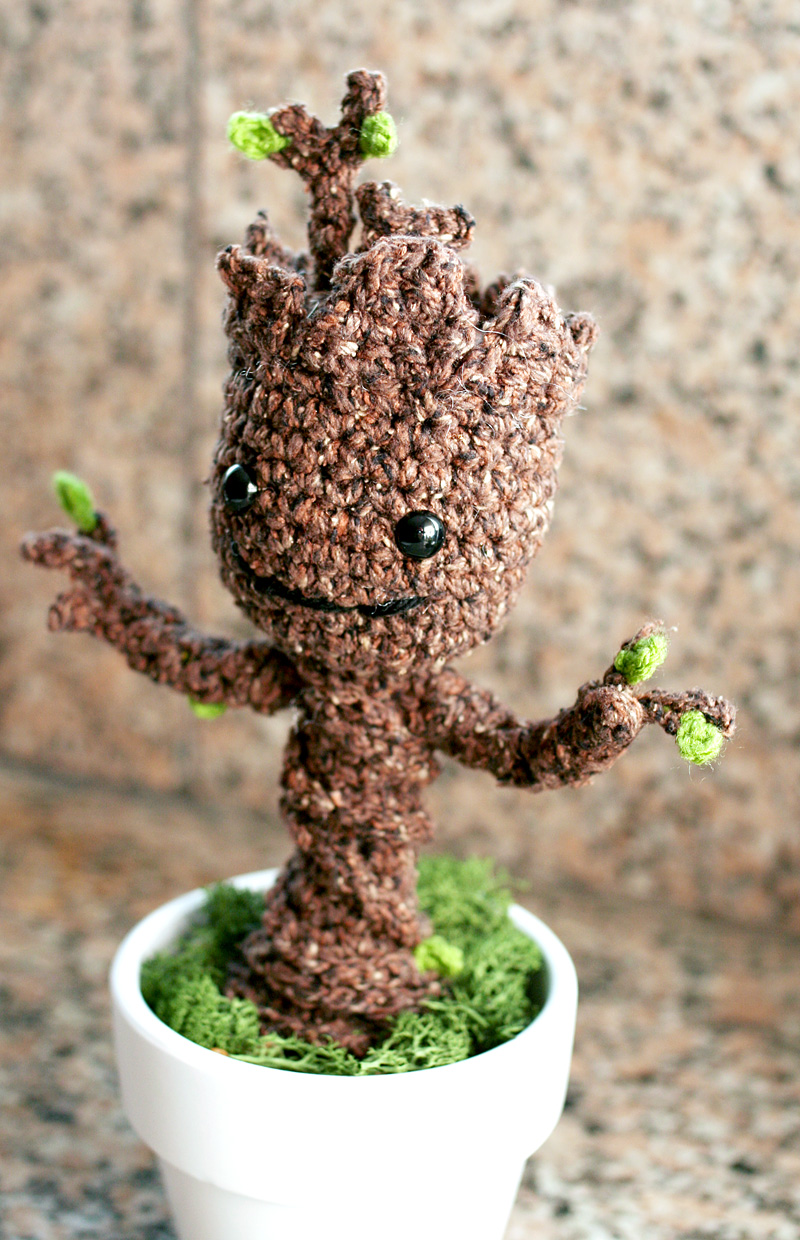
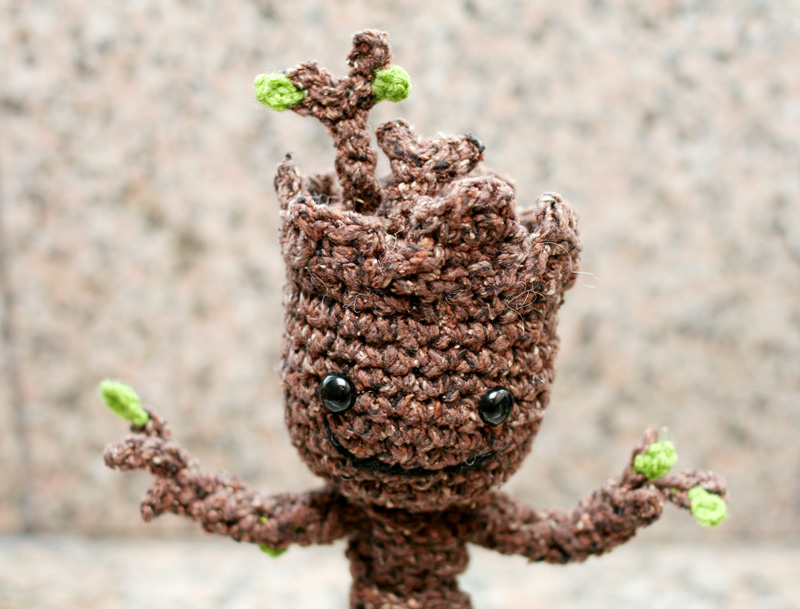
My takeaway from the movie was that WE ALL NEED A BABY Groot, so here is your free crochet GROOTORIAL! If you haven’t seen the movie, Groot is this tree-like alien who is really big and strong and can grow stuff off his body and is basically like the Giving Tree on steroids.

I don’t want to spoil why there is a baby Groot and why people are going crazy about him if you haven’t seen the movie yet, so go see it and then it will all make sense!
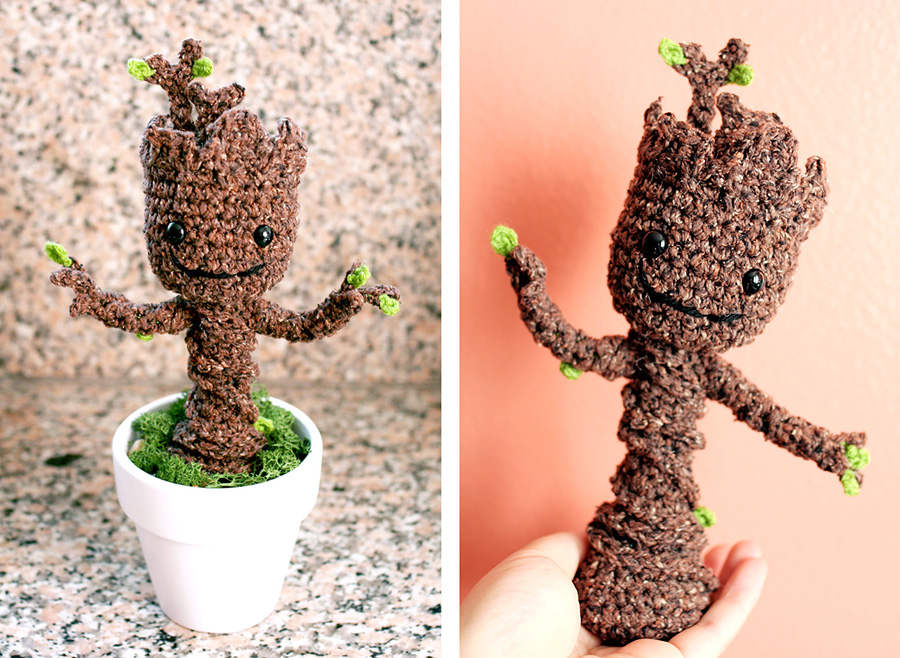
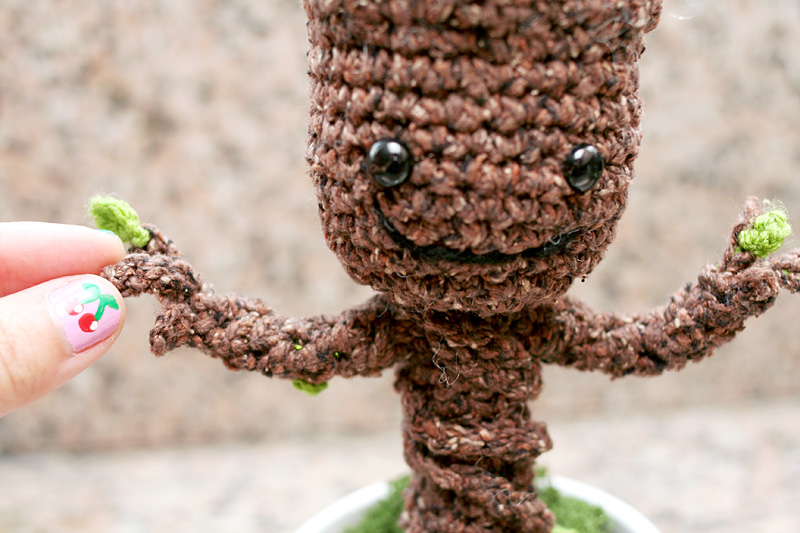
I put pipe cleaners in his arms so that he could “dance.” I tried wiring his body, too, but was running into complications with figuring out how to put stuffing in him AND a wire….plus the pipe cleaner wasn’t really strong enough to support his head and body and pipe cleaner was all I had in the house… so I need to play with that more at some point! Anyway, now you all can have your own baby Groot! And I am sure you guys will each put your own little spin on him!! I used online images of
the Funko bobble head as my inspiration, cuz I think it’s super adorable!


 P.S. Thank you for all your kind and excited inquiries about whether I will be selling finished baby Groots. I’m really so happy that you guys like him so much! I will not be doing so, since I currently do not have permission or a license from Marvel. I do plan to have a giveaway soon, though, so stay tuned! (And no, I will not be doing a giveaway directly to you only, which is something someone asked!)
What You’ll Need
- H8/5.00mm and F5/3.5mm crochet hooks
– Worsted weight yarn in Brown (I used Rowan Summer Tweed in Chocolate Fudge, but it’s discontinued now. I believe Lion Brand Vanna’s Choice has a brown tweed, and Plymouth Encore Worsted definitely has a brown tweed, but any brown or tan/wood color will work!)
– Sport weight yarn in Green (I used Red Heart Designer Sport in Pistachio)
– Black embroidery thread or Black worsted weight yarn (I used Lion Brand Vanna’s Choice in Black) – If you’d rather not crochet tiny leaves, you can also use green felt to cut out leaves, and sew them on with green or brown thread.
– 2 9mm safey eyes (12mm looks cute, too!)
– small amount of Polyfil
– 1 12-inch pipe cleaner or some kind of wire for the arms
– scissors
– tapestry needle
– small plant pot
– a handful of small, smooth pebbles
– optional: fake moss, hot glue
Abbreviations
ch(s): chain(s)
sc: single crochet
sk: skip
sl st: slip stitch
dec: decrease – you can use invisible decrease (invdec) or sc2tog
( ): work everything inside the parenthesis into the next stitch
[ ]: work everything inside the bracket the number of times indicated
Notes
I just busted out this pattern last night, and it has not been tested yet. If there are any booboos or weird spots, let me know!

Head Part A
With Brown and H hook, make magic ring, or ch 3 and sl st to 1st ch to form ring.
Rnd 1: Ch 1, 6 sc into ring. (6) Don’t join rnds. Continue to work in a spiral.
Rnd 2: (2 sc) 6 times. (12)
Rnd 3: [(2 sc), 1 sc] 6 times. (18)
Rnd 4: [(2 sc), 2 sc] 6 times. (24)
Rnd 5: [(2 sc), 7 sc] 3 times. (27)
Rnds 6 -11: Sc evenly. (27)
Sl st to next st to join.
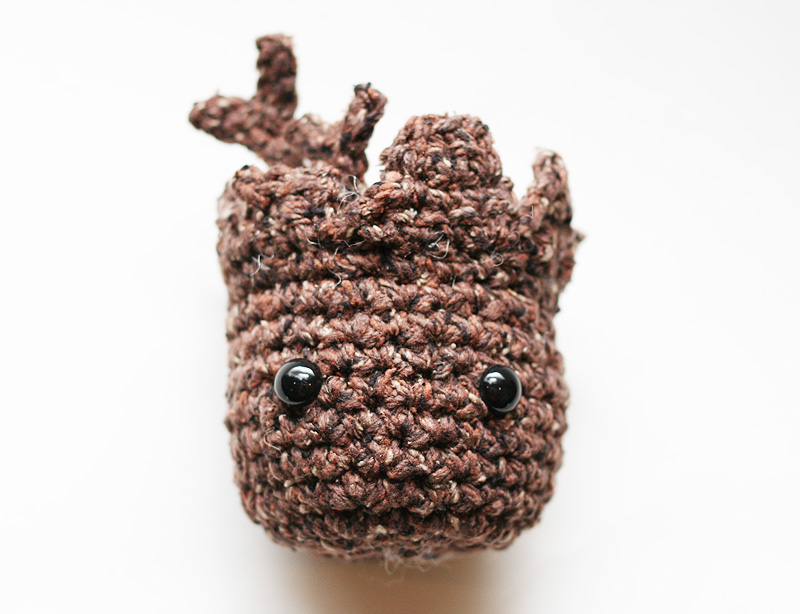
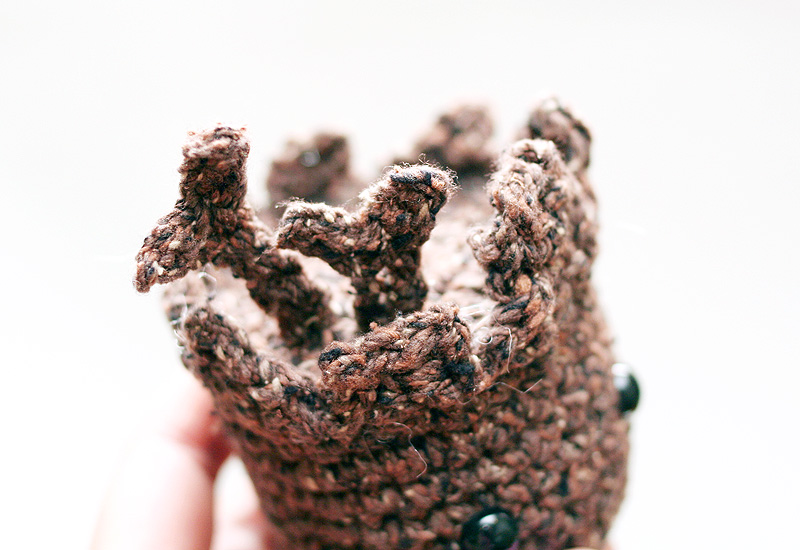
You’ll now work on his broken-wood head accents.
Rnd 12: You’ll be crocheting triangular-ish and rectangular-ish shapes, and then slip stitching down one side of each shape to get your hook back to Rnd 11. We do this so we don’t have to break off and re join over and over again to continue our work. I broke each shape into different paragraphs so that they are easier to see and organize.
Ch 1, 3 sc evenly. Ch 1, turn. 3 sc evenly. Ch 1, turn. Sk 1 st, 2 sc evenly. Sl st down the side of the rows you just worked until you are about to work into Rnd 11 again.
4 sc evenly. Ch 1, turn. 4 sc evenly. Ch 1, turn. Sk 1 st, 1 sc, sk 1 st, 1 sc. Ch 1, turn. Sk 1 st, 1 sc. Ch 1, turn. Sl st down the side of the rows you just worked until you are about to work into Rnd 11 again.
4 sc evenly. Ch 1, turn. 4 sc evenly. Ch 1, turn. 3 sc, sk last st. Ch 1, turn. 3 sc. Ch 1, turn. Sk 1, 1 sc. Sl st down the side of the rows you just worked until you are about to work into Rnd 11 again.
3 sc evenly. Ch 1, turn. 3 sc evenly. Ch1, turn. 1 sc, sk 1, sl st, 1 sc. Sl st down the side of the rows you just worked until you are about to work into Rnd 11 again.
4 sc evenly. Ch 1, turn. 4 sc evenly. Ch 1, turn. Sk 1 st, 1sc, sk 1 st, 1 sc. Ch 1, turn. Sk 1 st, 1 sc. Ch 1, turn. Sl st down the side of the rows you just worked until you are about to work into Rnd 11 again.
3 sc evenly. Ch 1, turn. 3 sc evenly. Ch1, turn. sk 1, 2 sc. Ch 1, turn. 1 sc, sl st. Sl st down the side of the rows you just worked until you are about to work into Rnd 11 again.
3 sc evenly. Ch 1, turn. 1 sc , sk 1, 1 sc. Ch1, turn. Sk 1, 1 sc. Sl st down the side of the rows you just worked until you are about to work into Rnd 11 again.
3 sc evenly. Ch 1, turn. 3 sc evenly. Ch1, turn. 1 sc, sk 1, sl st, 1 sc. Sl st down the side of the rows you just worked until you are about to work into Rnd 11 again.
Sl st into Rnd 11 and break off. Weave in end.
Insert eyes. You get to decide which part of the head should be the face.
Now you’ll finish the top of the head. You’re just making a circle to cover the hole.
Head Part B
With Brown, repeat Rnds 1-4 of Head Part A.
Sl st to next st to join. Break off leaving 24 inches of yarn.
If you want a branch or two sticking out of his head, crochet these now and sew them to the top of Head Part B before you sew it to the top of Head Part A.
Branch
With Brown and H hook, ch 8, sk 1 ch, work 2 sl st evenly. Ch 4, sk 1 ch, work 3 sl st evenly, then continue to sl st evenly down original ch. Break off.
Short Branch
With Brown and H hook, ch 6, sk 1 ch, work 2 sl st evenly. Ch 3, sk 1 ch, work 2 sl st evenly, then continue to sl st evenly down original ch. Break off.
Lightly stuff Head Part A.
Since Head Part B is 24 sts around and open hole of Head Part A is technically 27 sts around, you can’t sew stitch for stitch, so just sew it on as best you can and make it look good. I found that using a 27 st circle was too big for the opening. You can use Rnd 11 of Head Part A as a guide for sewing. While sewing, you also don’t want the head to look like it has Frankenstein stitches going all around it, so try to sew as invisibly as you can. Put in more stuffing if needed.
Body
Repeat Rnds 1-4 of Head Part A.
Rnds 5 -6: Sc evenly. (24)
Rnd 7: [dec, 2 sc] 6 times. (18)
Rnd 8: [dec, 4 sc] 3 times. (15)
Rnds 9 -10: Sc evenly. (15)
Put in some stuffing.
Rnd 11: [dec, 3 sc] 3 times. (12)
Rnds 12-13: Sc evenly. (12)
Rnd 14: [dec, 2 sc] 3 times. (9)
Rnds 15 – 21: Sc evenly, stuffing lightly as you go. (9) (Note, I worked 21 rnds because at first I was measuring the Body against a piece of pipe cleaner that I had. You can make him as tall as you like.)
Sl st to next st to join. Break off leaving 12 inches of yarn for sewing.
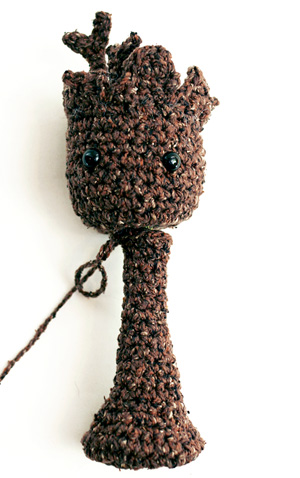
Sew top of Body to bottom of Head Part A.
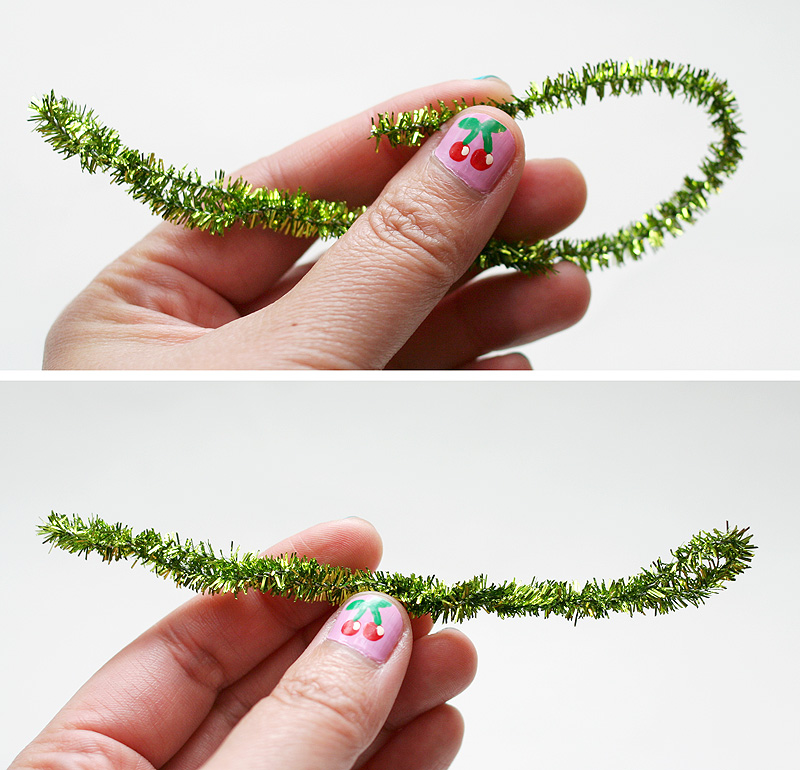
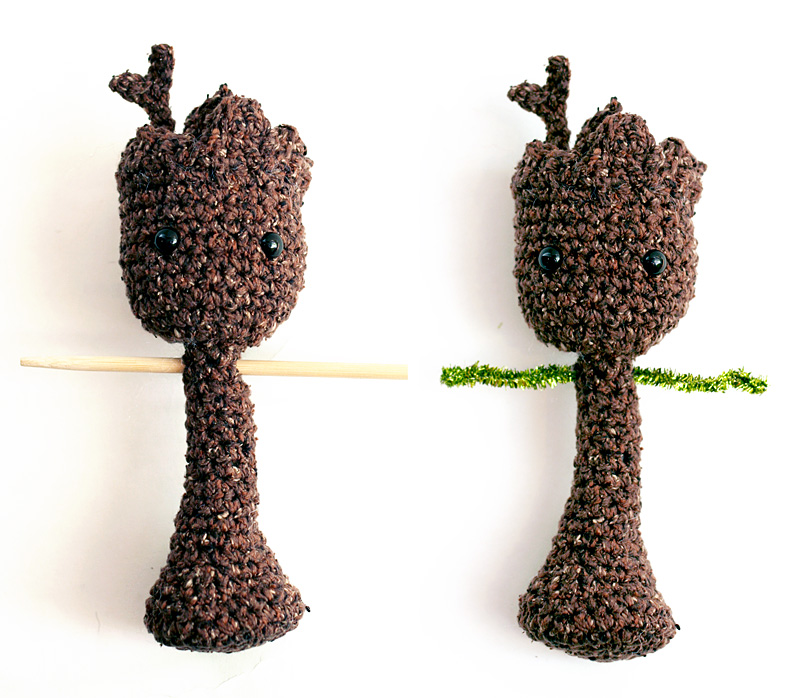
To prepare Arms, fold each end of the pipe cleaner to its center and then twist.
Use a pointy stick to stab through top of Body where Arms will go. I go 1 rnd below the the very top of the neck. This will help guide the pipe cleaner arms through the body. Slide twisted pipe cleaner into place.
You can now determine how long you want the arms and lengthen/shorten the pipe cleaner accordingly.
Arms (make 2)
Pull out about 10 inches of Brown yarn for sewing later.
With H hook, ch 3 and sl st to 1st ch to form ring. (Don’t make a magic circle, or if you do, keep the opening loose bcecause you need to fit the pipe cleaner through this hole.
Rnd 1: Ch 1, work 4 sc into ring. (4)
Rnds 2 – 8: Sc evenly around. (4)
Slip Arm through pipe cleaner to see if it fits. Keep working evenly if you need more coverage.
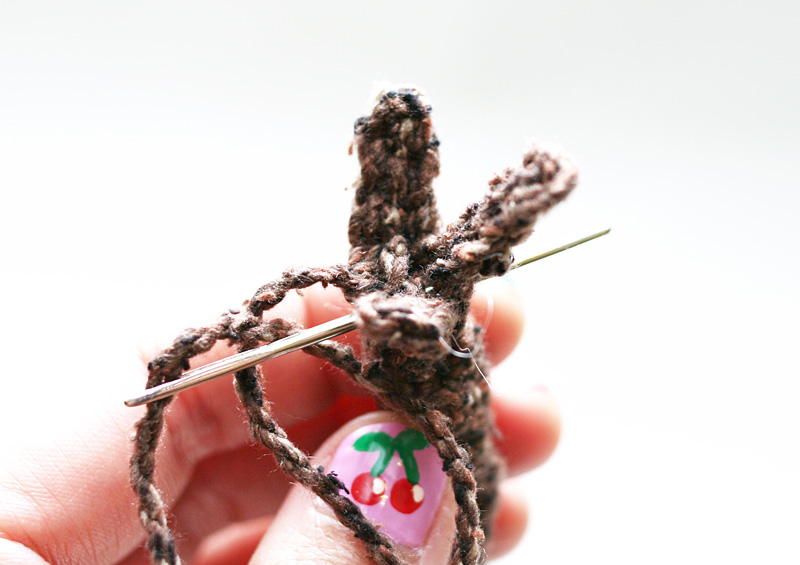
When you reach the length that you need, create the finger branches.
Sl st to next st to join.
Ch 3, sk 1st ch, sl st 2 times. Sl st to next st.
Ch 5, sk 1 st ch, sl st 4 times. Sl st to next st.
Ch 4, sk 1st ch, sl st 3 times. Sl st to next st.
Sl st to next st. Break off.
While weaving in your end, also sew through the base of the fingers to pull the fingers so they are not splayed too open.
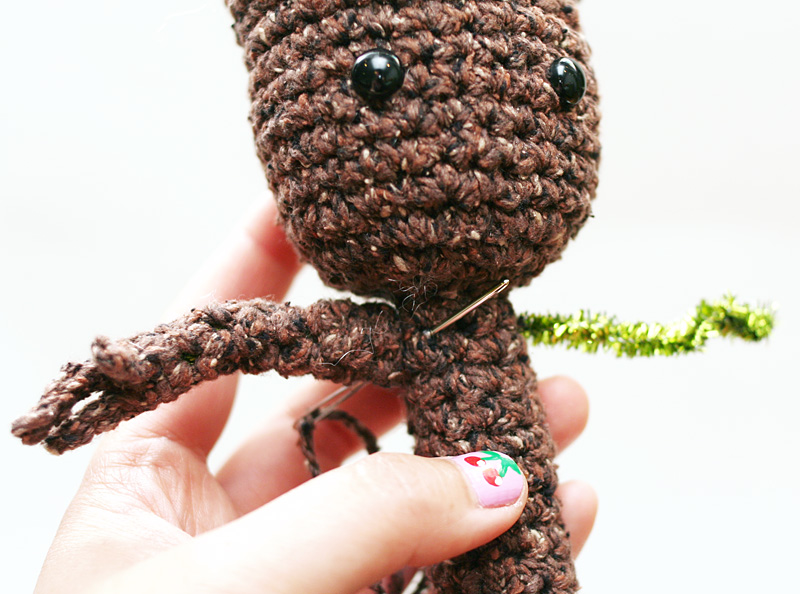
Slide Arm back onto pipe cleaner and then sew to body. Repeat on other side.
Leaves
The number of leaves and their placement are up to you!
With Green and F hook, ch 5 or ch 4 and sl st to 1st ch to form your leaf. Break off.
Tie leaf onto tree with yarn tails and then carefully weave in ends and/or hide them inside the tree.
Twisty Body Bits
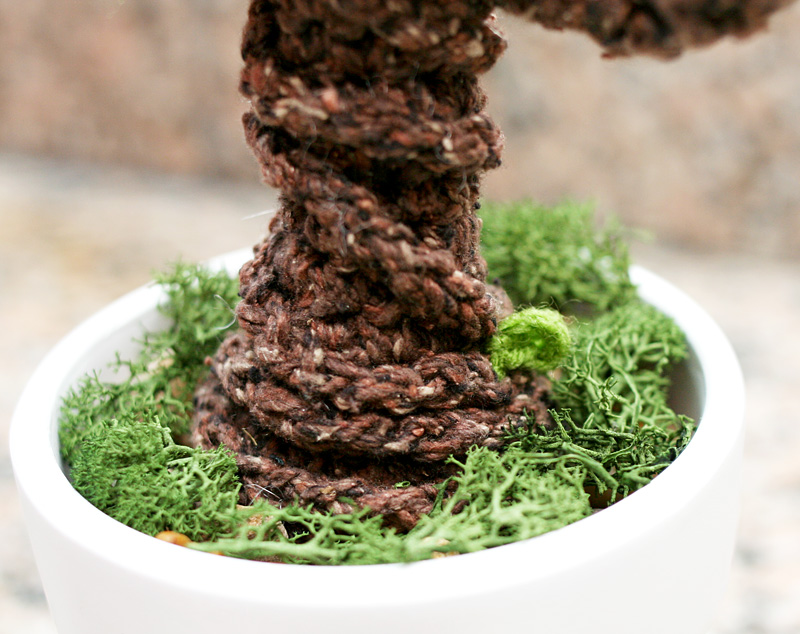
If you want to add some twisty/viney bits to the body, simply work about 12 – 18 inches of chs with Brown and H hook, then wrap chain lengths around Body, sewing down at each end, and also tacking down with a few stitches around the middle wherever you want to make sure the vine stays put. I only made 2 lengths of chain, but you can add more, or put some on the arms, if you like!
Final Assembly
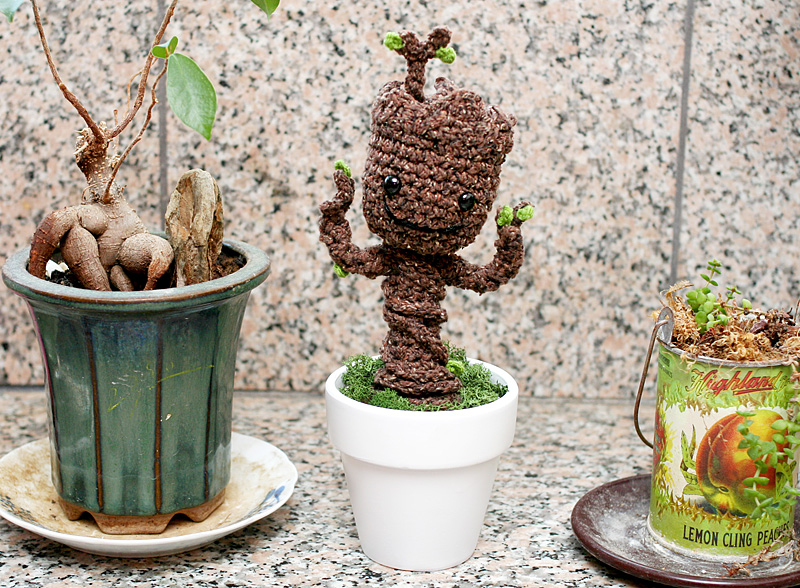
– Embroider a smile with black yarn or embroidery thread.
– Place baby Groot inside a small pot.
– Fill in with smooth pebbles to keep him upright. You might also need some pebbles underneath, so that he is not sitting too low in the pot.
– Decorate with fake moss.
– If you are giving this as a gift, and you don’t want anything to move around, you can also hot glue your baby Groot to the bottom of your pot, or glue something to the bottom of the pot for him to stand on, and then glue him to that, then cover with pebbles, moss, or both!
– EDIT: A couple people have commented that their Groot is too top heavy to stand on its own. I did not design him to stand up by himself. I always keep mine in his little white pot. The next one I make for my friend, I am going to try putting a little sack of
Poly Pellets at the bottom and see if that helps. Don’t use loose pellets, as they might leak out of the stitch spaces. I’ve seen on google that some people make a little sack with a dryer sheet, but I’ll probably use a small square of fabric and sew it up, place it at the bottom/feet of the body, and then fill the rest of the body with regular stuffing. I’ll let you know if it works! Also don’t use beans to weigh down your toys. I’ve heard that sometimes if there is too much moisture, the beans will sprout! Which, in this particular case, might be kinda funny, but would also probably ruin your toy :P.

* This free pattern is intended for personal use only. Please do not copy, redistribute, or sell this pattern. Groot and Guardians of the Galaxy are the intellectual property of someone else who is not me or you, I am guessing Marvel Comics? So I would advise you not to sell items from this pattern without permission.