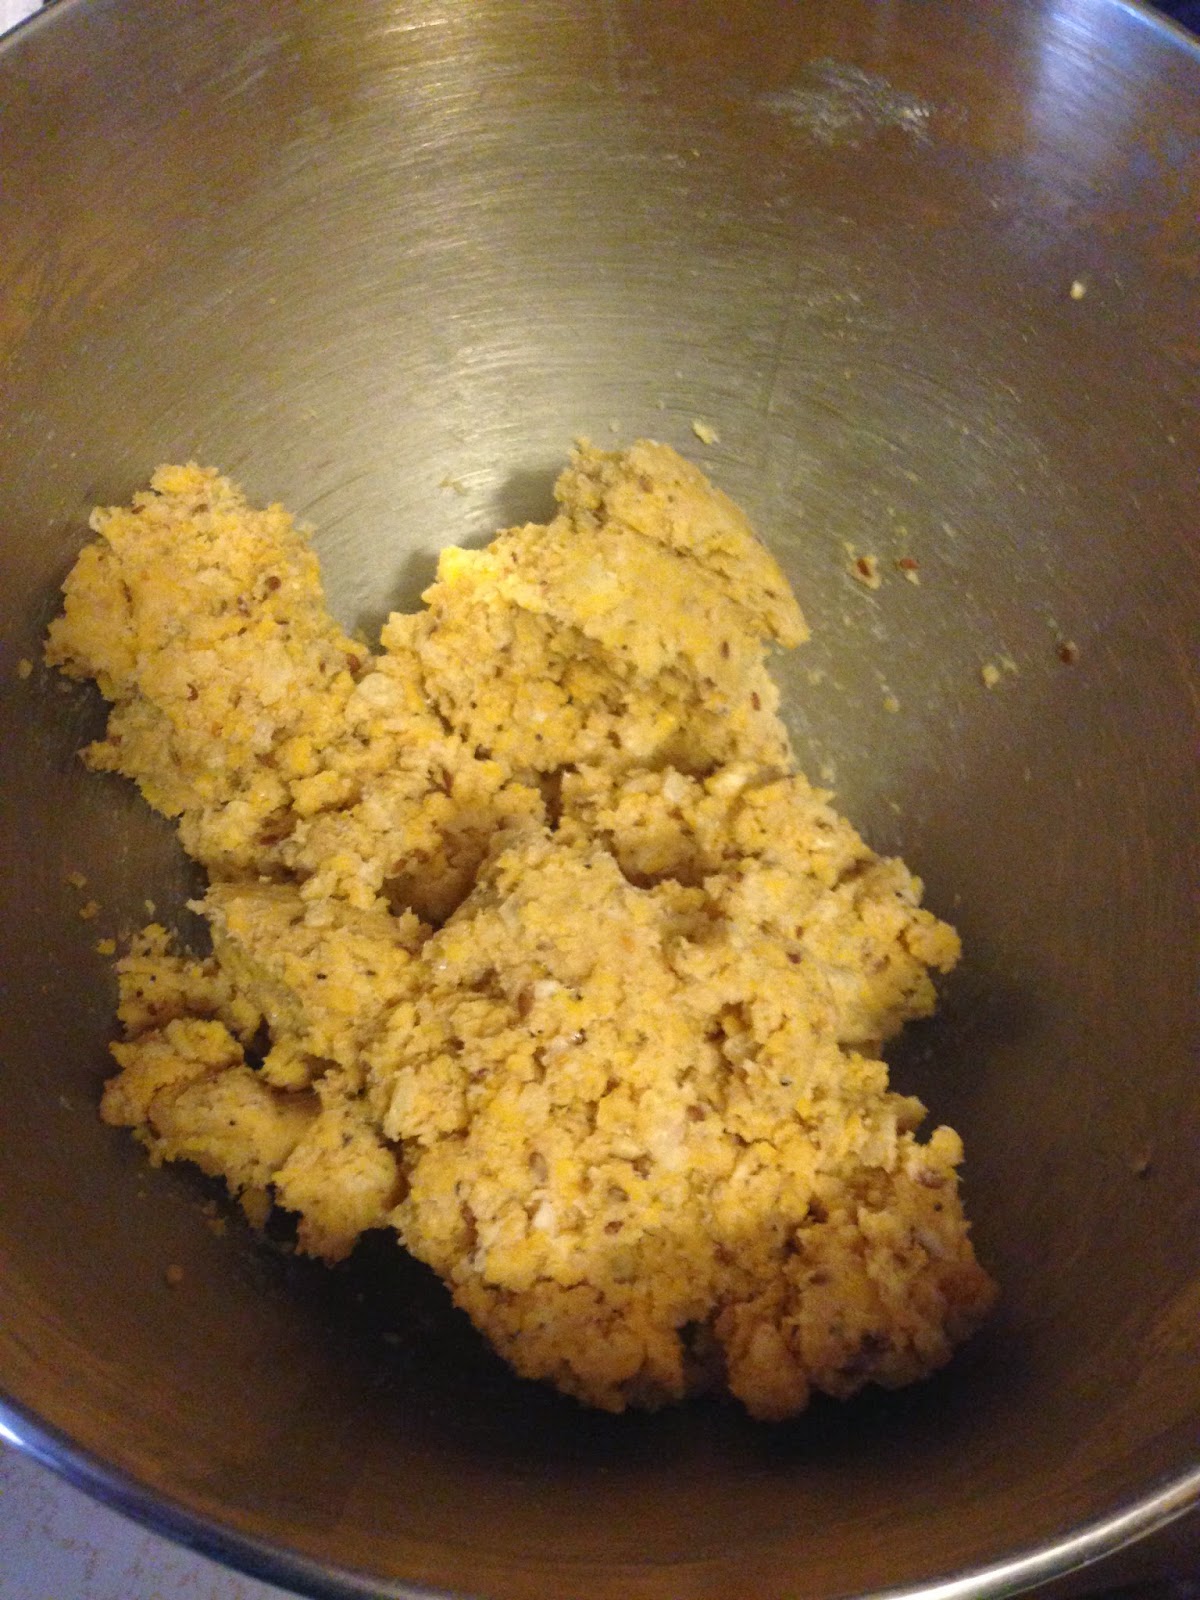
A light crunch, and savory snack cracker that has a bit of a kick. Easy recipe with minimal ingredients. Try adding 4T of sesame or flax seeds before kneading for a different option.
2c flour
1lb cheddar cheese ( 1lb~4cups)
1lb butter (2sticks)
2c rice krispies
pinch salt
sprinkle of cayenne
1. Preheat oven to 300F
2. Combine ingredients in mixer and use beater attachment until well incorporated.
3. Form in to small balls and press down on a cookie sheet or silicon mat.
4. Bake for 30min until light and crispy.
Note:
if using silicon mat or convection start checking at 15min.
if using the amounts above it will fill a standard 4.5qt Kitchen Aid mixing bowl
HALF the recipe so there aren't soooo many to eat.
This is the traditional "Midday Dandelion Wine" of old, named
because the flowers must be picked at midday when they are fully open. This wine has less
body than the first recipe produces, but every bit as much flavor (some
say more!).
2 qts dandelion flowers
3 lbs granulated sugar
4 oranges (juice of 4 oranges ~ 1c)
1 gallon water
yeast and nutrient
Set one gallon of water to
boil.
While it heats up to a boil, remove as much of the green
material from the flower heads as possible (the original recipe calls
for two quarts of petals only, but this will work as long as you end up
with two quarts of prepared flowers).
Pour the boiling water over the
flowers, cover with cloth, and leave to steep for two days. Do not
exceed two days. (will probably use a glass gallon pickle jar)
Pour the mixture back into a pot and bring to a boil.
Add the peelings from the four oranges (again, no white pith) and boil
for ten minutes. (I don't want to use orange peelings, I just want to boil for 10min and then dump the sugar and orange juice)
Strain through a muslin cloth or bag onto a crock or
plastic pail containing the sugar, stirring to dissolve. (so if I do this how I want I would skip stirring in the sugar)
When cool, add
the juice of the oranges, the yeast and yeast nutrient. (I will add juice after the boil to help cool)
Pour into
secondary fermentation vessel with airlock, and allow to
ferment completely.
Rack till wine clears and no more lees form (~60 days) then bottle.
Allow it to age six months in the bottle
before tasting, but a year will improve it vastly.
And as I always fear when I am ready to do this project I will never be able to find the link again.
So here are the highlights.
Step 1: What you need
colored quilling paper strips (or colored paper that you can cut into thin strips, like I did here)
black cardstock
white glue
quilling tool
pink thread
scotch tape
scissors/cutter
ruler
Step 2: The cake
You need to make 3 different coils using 3 strips of beige/cream paper.
Roll the first strip around the quilling tool until you reach the other
end. This is a tight coil...to create a loose coil, remove the coil
from the tool and, keeping it in shape with your fingers, let it open up
a little so that it becomes loose.
The 3 coils need to be one
bigger than the other so one will be looser, the next one a little
tighter and the last one even tighter. Make sure that the last one won't
be too tight.
Put some glue on the tip of the strip to fix the coils.
Now that all of your coils are ready, press each of them a little with your fingers, as if you had to create a "D" shape.
These will be the layers of the cake.
Glue the middle size coil on the biggest one, making sure not to place
it in the middle of it. The straight sides need to be joined together.
You can see how I did it in the pictures above.
Finally, glue the smallest coil the same way on the middle one.
Step 3: The candles
The candles need 2 different parts: the body of the candle and the flame.
For the body, roll a very short strip of white paper using the quilling tool. It must be a tight coil and very tiny. Make about 2 or 3 rounds and secure it with glue.
Don't forget about the proportions: always look at the cake to make
sure that the candles you are making are not too big for it.
Make 2 identical candles and glue them on the first layer of the cake.
To make the flame of the candle you need an orange strip of paper. It
needs to be short, but not as short as the one for the body. I can't
tell for sure how long it is, all I did is rolling the paper and cutting
the strip when I thought that the coil was big enough.
Make a loose coil with it and finally press it with your thumb and index finger to create a teardrop shape.
If you made 2 bodies before, you'll need 2 of these flames.
Glue them on the top of the candles' bodies always using white glue.
Step 4: The box structure
Now that your cake is all done, it's time to make the box.
The first thing you have to do is drawing the structure of the flat box on a piece of black cardstock.
You can see what the shape is in the pictures: it has 2 identical
squares that are 5cm (1.96 inches) big with a rectangle in the middle
and 3 other identical ones on the sides of one of the squares. The
rectangles are 1,5cm (0.59 inches) large.
Cut the structure from the cardstock and fold the first square following the line you traced.
That square will be the front of the box.
Step 5: The letters
Make the letters to go on top of the box and glue on top of the box.
Step 6: Fold up the box.
Note: I think I would fold up the box before I put the letters on the cover.
You need to close the box now.
Following the lines you traced on the box structure, fold all the pieces as you can see in the first picture.
Keep them folded in a box shape putting some little pieces of scotch tape on the inside angles.
Since I wasn't sure that the scotch tape was enough to keep it firm, I
decided to glue a white strip of paper all around the thin sides of the
box, as if it was a ribbon.
Finally I glued the cake inside the box (on the bottom part) and wrote a note right above it.
This way it looks as if the cake was standing on the bottom side of the box.
Step 7: Close the box
To keep the box closed (if the cover tends to open) I added a pink thread.
Make a little hole in the middle of the right side of the box and another hole in the middle of the right side of the cover.
Cut a piece of pink thread (it must be big enough for you to be able to
make a bow with it), pass it through both holes and make a bow.
Basic soap recipe sounds so boring, but I really like this recipe
because it is simple, bound to work out great, and you can add whatever
kinds of lovely smells that you like to jazz it up. Keep in mind that
you can substitute Vegetable Shortening for the Lard if you like. For
more information on soap making see the “Homemade Soap” menu at the top
of the page.
Basic Soap Recipe
48 oz Lard
21 oz Olive oil
18 oz Coconut Oil
28 oz cold water
12 oz lye crystals
1/2 oz jasmine or other Essential Oil
Temp: 100 degrees Fahrenheit
Directions:
Weigh all ingredients and set aside.
Melt the lard, olive oil, and coconut oils together in a large stainless steel pot and remove from heat.
Pour lye crystals into water (never water into lye) and stir until dissolved.
When lye water and oil mixtures both reach 100 degrees F (use a cold
water bath for your pot to help them reach this at the same time if
necessary), pour the lye water into the oil mixture and whisk on and off
until trace forms (when you can see a path left after drizzling the
mixture over the top with a spoon).
Mix in the Essential Oil and pour into mold.
Incubate for 24 hours before cutting. Let air out for 4-6 weeks before using.
- I hook, 5.5mm
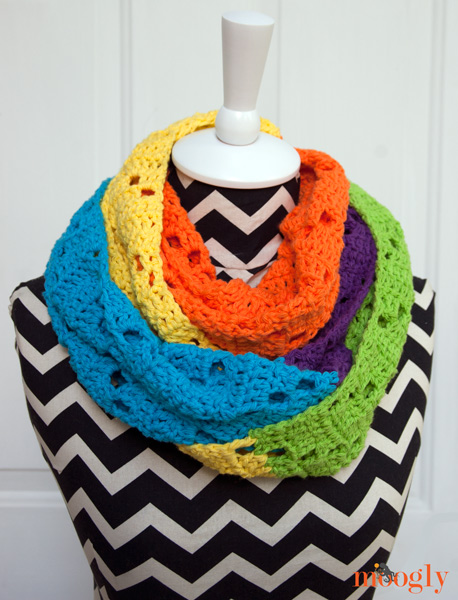
- 5 colors, 92yd each for total of 460yd (8.9oz) worsted weight (Bernat Handicrafter shown)
- Gauge: 14sts x 7 rows = 4" in pattern
- Size: 8" wide x 78" long (before joining ends to create infinity scarf)
Notes and Tips:
- I've written the pattern in standard format, starting each row with a ch 3, which count as the fist st of the row. However, I recommend using the Chainless Starting Dc instead for an even better result.
After row 1, dc into the ch sp when appropriate rather than the ch itself.
Every row will have 28sts, including the chain sts.
If you use a st marker to mark the side of every row 19 repeat, it will make counting rows to stay on pattern easier.
Row
1: With Color A, ch 30. Dc in the 4th ch from the hook (3 ch counts as first
st). Dc in the next ch. [Ch 2, skip 2 ch, dc in the next 7 ch] twice. Ch 2,
skip 2 ch, dc 5. Turn.
Row
2: Ch 3, dc in the next 6 sts. [Ch 2, skip 2 sts, dc in the next 7 sts] twice.
Ch 2, skip 2 sts, dc in the last st. Turn.
Row
3: Ch 3, dc in the next 7 sts. [Ch 2, skip 2 sts, dc in the next 7 sts] twice.
Ch , skip 1 st, dc in the last st. Turn.
Row
4: Ch 3, dc in the next st. [Ch 2, skip 2 sts, dc in the next 7 sts] twice. Ch
2, skip 2 sts, dc in the last 6 sts. Turn.
Row
5: Ch 3, dc in the next 3 sts. [Ch 2, skip 2 sts, dc in the next 7 sts] twice.
Ch 2, skip 2 sts, dc in the last 4 sts. Turn.
Row
6: Ch 3, dc in the next 5 sts. [Ch 2, skip 2 sts, dc in the next 7 sts] twice.
Ch 2, skip 2 sts, dc in the last 2 sts. Turn.
Row
7: Ch 4, skip the next st, dc in the next 7 sts. [Ch 2, skip 2 sts, dc in the
next 7 sts] twice. Dc in the last st. Turn.
Row
8: Ch 5, skip the next 2 sts, dc in the next 7 sts. [Ch 2, skip 2 sts, dc in
the next 7 sts] twice. Turn.
Row
9: Ch 3, dc in the next 4 sts. [Ch 2, skip 2 sts, dc in the next 7 sts] twice.
Ch 2, skip 2 sts, dc in the last 3 sts. Turn.
Row 10: Repeat Row 9
Row
11: Repeat Row 8
Row
12: Repeat Row 7
Row
13: Repeat Row 6
Row
14: Repeat Row 5
Row
15: Repeat Row 4
Row
16: Repeat Row 3
Row
17: Repeat Row 2
Row
18: Ch 3, dc in the next 2 sts. [Ch 2, skip 2 sts, dc in the next 7 sts] twice.
Ch 2, skip 2 sts, dc in
Row
29 – 55: With Color B, sl st (or use Standing Dc) to join to last st of Row 28. Repeat
Rows 11 – 19, then repeat Rows 2 – 19. Break yarn and finish off.
Rows
56 – 82: With Color C, sl st to join to last st of Row 55. Repeat Rows 2 – 19,
then repeat Rows 2 – 10. Break yarn and finish off.
Rows
83 – 109: With Color D, sl st to join to last st of Row 82. Repeat Rows 11 –
19, then repeat Rows 2 – 19. Break yarn and finish off.
Rows
110 – 136: With Color E, sl st to join to last st of Row 109. Repeat Rows 2 –
19, then repeat Rows 2 – 10. Break yarn leaving an 18″ tail for sewing.
Using
the tail, whip st Row 1 and Row 136 evenly together to form infinity scarf (or
leave unsewn for long standard scarf). Weave in all ends.
Row
1: With Color A, ch 30. Dc in the 4th ch from the hook (3 ch counts as
first st). Dc in the next ch. [Ch 2, skip 2 ch, dc in the next 7 ch]
twice. Ch 2, skip 2 ch, dc 5. Turn.
Row 2: Ch 3, dc in the next 6 sts. [Ch 2, skip 2 sts, dc in the next 7 sts] twice. Ch 2, skip 2 sts, dc in the last st. Turn.
Row 3: Ch 3, dc in the next 7 sts. [Ch 2, skip 2 sts, dc in the next 7 sts] twice. Ch , skip 1 st, dc in the last st. Turn.
Row 4: Ch 3, dc in the next st. [Ch 2, skip 2 sts, dc in the next 7 sts] twice. Ch 2, skip 2 sts, dc in the last 6 sts. Turn.
Row 5: Ch 3, dc in the next 3 sts. [Ch 2, skip 2 sts, dc in the next 7 sts] twice. Ch 2, skip 2 sts, dc in the last 4 sts. Turn.
Row 6: Ch 3, dc in the next 5 sts. [Ch 2, skip 2 sts, dc in the next 7 sts] twice. Ch 2, skip 2 sts, dc in the last 2 sts. Turn.
Row 7: Ch 4, skip the next st, dc in the next 7 sts. [Ch 2, skip 2 sts, dc in the next 7 sts] twice. Dc in the last st. Turn.
Row 8: Ch 5, skip the next 2 sts, dc in the next 7 sts. [Ch 2, skip 2 sts, dc in the next 7 sts] twice. Turn.
Row 9: Ch 3, dc in the next 4 sts. [Ch 2, skip 2 sts, dc in the next 7 sts] twice. Ch 2, skip 2 sts, dc in the last 3 sts. Turn.
460 yds (8.9oz) total worsted weight yarn, in 5 colors (Bernat Handicrafter shown, approx. 92 yds of each)
Stitch marker (optional)
Gauge: 14 sts x 7 rows = 4″ in pattern
Size: 8″ wide x 78″ long (before joining ends to create infinity scarf)
Notes and Tips:
I’ve written the pattern in standard format, starting each row with a
ch 3, which counts as the first st of the row. However, I recommend
using the Chainless Starting Dc instead for an even better result!
After Row 1, dc into the ch sp when appropriate, rather than the ch itself.
Every row will have 28 sts, including the chain sts.
If you use a st marker to mark the side of every Row 19 repeat, it will make counting rows to stay on pattern easier.


 sd
sd