Here is the link for the pdf http://www.ravelry.com/patterns/library/its-all-about-the-messy-bun#

Materials: <100g of worsted weight yarn. Red Heart Boutique Unforgettable-Parrot.
Size H Hook & tapestry needle to sew in ends.
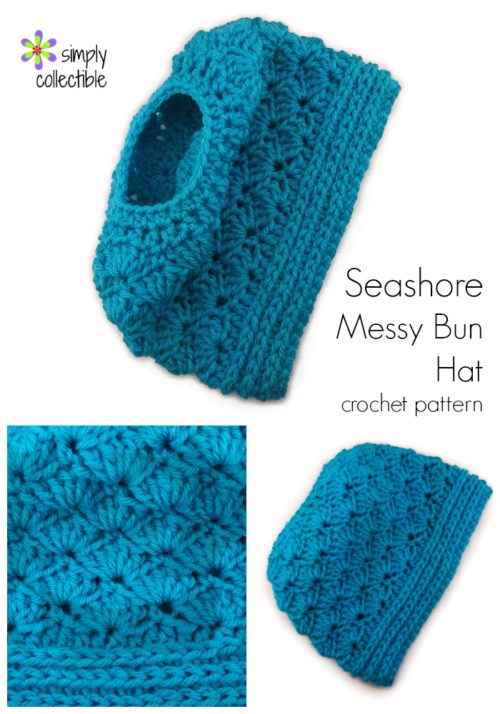
Note: The ch2 at the beginning of each round does not count as a stitch. The ch2 is to help hide your join line. When you slip stitch into the top of the chain at the end of each round to join, pull snugly before crocheting into the first stitch. This helps to close up the gap a bit. Notice the join line is hardly noticeable: my color changes happen to occur at the exact point of the join for this hat, creating a very noticeable jog line. More than likely, yours won’t be as noticeable.
Chain 36 and join in the round to the first chain, being careful not to twist. This will give you an
opening that is approximately 2 ½” in diameter.
Row 1: Ch2, DC in first chain stitch and in each stitch around. Join with slip stitch to ch2. 36
stitches.
Row 2: Ch2,* 2 DC in the first stitch, DC in next 2 stitches. Repeat from * around. Join with slip
stitch to the ch2. 48 Stitches
Row 3: Ch2, * 2 DC in the first stitch, DC in next 3 stitches. Repeat from * around. Join with slip
stitch to the ch2. 60 Stitches.
Row 4: Ch2, * 2 DC in the first stitch, DC in next 4 stitches. Repeat from * around. Join with a
slip stitch to the ch2. 72 Stitches.
Row 5- 11**: Ch2, DC in each stitch around. Join with a slip stitch to the ch2.
Should measure 5-5.5". Total lenght with ribbing should be 7-7.5"
** You can make it longer or shorter by adding or decreasing these DC rows. Take in to account
that the ribbed brim will add approx. 2 more inches to the hat.
RIBBED BRIM:
When you have completed your last DC row and joined to the ch2, ch11 stitches. SC into the
2nd chain from the hook and in each chain to the hat. 10 Stitches.
Slip stitch into the next 2 stitches on the hat (the dc stitches of the last dc row worked in the
round). Ch1 and turn.
(Now begin to crochet into the back loops only)
** Single crochet into the BLO of the next 10 stitches. On the final stitch (10th stitch) on the
edge, crochet into both loops for this row and throughout for a nicer finished edge. Ch1 and
turn.
Single crochet into the BLO of each of the 10 single crochet stitches, then slip stitch into the
next 2 stitches of the last DC round. Ch1 and turn.
Repeat from ** around the entire hat, until you have only 1 stitch left on the hat to slip stitch into
(if you have 2, that’s ok).
Hold the 2 edges of the brim together and slip stitch up the edge to join. Fasten off and weave in
your ends.
ALTERNATE ENDING: (Because sometimes we just need alternatives!)
After making quite a few of these, I decided I wanted a quicker brim. I love love the look of the
single crochet brim, but that is a lot of single crochets! ;) So I’ve been playing around with some
different finishes, and really like this one, so here it is.
Follow pattern through Row 10.
Row 11: Ch2. *DC in first stitch, SC in next. Repeat from * around. Join to beginning ch2.
Row 12: Ch1. *SC in the first stitch, DC in the next. Repeat from * around. Join to beginning
ch1. (On this round you are doing a sc in the dc of the previous round, and a dc in the previous
sc).
Row 13: Ch2. HDC in each stitch around. Join to beginning ch2.
Row 14-19: Ch2. *FPDC around the first HDC of the previous round. BPDC around the next
HDC of the previous round. Repeat from * around. You should end with a BPDC. Join to
beginning ch2.
You can add or subtract as many of these brim rows as you like. As long as the hat, when
finished, is 7 - 7 ½” long, you will have a hat that is sized to fit most average adult heads.
ALTERNATE HAT ROWS: (Because DC’s all around can get boring!)
Work pattern through row 4:
Row 5: Ch2. *DC in first stitch, sc in next stitch. Repeat from * around. Join to beginning ch2.
Row 6: Ch2. *SC in first stitch, dc in next stitch. Repeat from * around. Join to beginning ch2.
Row 7: Ch2. DC in each stitch around. Join to beginning ch2.
Row 8: Ch2. DC in each stitch around. Join to beginning ch2.
Rows 9-12: Repeat Rows 5-8 one more time.
Row 13: Repeat row 5.
Row 14: Repeat row 6.
Row 15: Repeat row 7.
Now you are at the brim. You have a choice to either do the original brim (sc in the blo), or
follow Rows 14-19 of the ALTERNATE ENDING instructions above, adding a nice F&BPDC
ribbing. Note that you will be doing your F&BPDC’s around the double crochet round of row 15
(rather than the HDC rows as indicated in the alternate brim instructions above).