This is a post that I found on One Dog Woof. http://www.1dogwoof.com/2012/08/crochet-rug-from-t-shirts.html
I have tried making a rag rug before but never finished it because I ran out of scrap matieral to finish it. I was using old bed sheets and material scraps and I didn't want to go buy more material.
But I thought this would be a great way to use the scraps when you get done with a t-shirt quilt.
I want to do this in a oval or a rectangle. I also think this would be a great Christmas gift for the girls.
Step 1. Acquire fabric. In this case, I used XXL men’s t-shirts from Goodwill. Choose t-shirts that are mostly or 100% cotton, and have no or very little print on them, preferably, only above the arm line. You’ll also want the fabric weight to be fairly consistent
Step 2. Create your yarn. There are oodles of t-shirt yarn tutorials out on the internet. Feel free to choose any one of them, or try this one on for size. Cut the shirt below the arm line and below any print (hence the no or little print rule). Fold the t-shirt from one side to the other side but leave it about 1 inch short from actually meeting ends – this is your 1 inch allowance. Now cut the t-shirt into 1.5 inch strips, avoiding the 1 inch allowance. Thicker strips will give you thicker yarn. Thinner strips give you thinner yarn. Don’t cut too thin, or the yarn won’t form. Open up the shirt to see your 1 inch allowance. Cut starting from the hem, on a slant, from 1 strip to the next across the allowance – this connects all the strips together.
The basic idea is that the shirt is already in the round, so you’re cutting a continuous strip from the bottom hem up to the armpit. Actually, remove the hem before cutting – it doesn’t curl well (or, at all). Once you have the big strip, stretch the strip and allow the knit in the t-shirt to curl in on itself, thus creating the yarn.

Step 3. Ball up your yarn. This is actually pretty important, but once I started to crochet, I realized I twisted the yarn as I balled it, so there was a lot of tension. I ended up unraveling the whole darn thing before crocheting, which kind of defeats the purpose of balling it up in the first place.

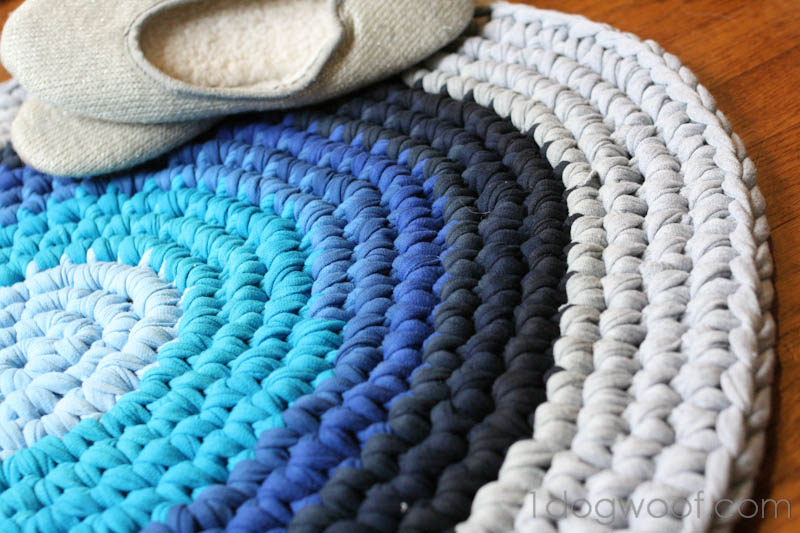
Step 4. Crochet. I used a single crochet here for a dense weave. You’ll be crocheting in the round, so start either with a magic circle or the Chain 2 method. Both are described in this post. For a quick look at the single crochet, head over to this post, or check out the other crochet tutorials I have!
I used the largest crochet hook I had on hand, which was a size Q and started with 6 SC in the first round, doubled it to 12 in the second round, and slowly increased by multiples of 6 beyond that. In retrospect, I think I would also try starting with 4, doubling to 8, and then actually counting my way around.
1st round: 6 SC
2nd round: 2 SC in each stitch (12 stitches)
3rd round: *1 SC in next stitch, 2 SC in next stitch, repeat from * (18 stitches)
4th round: * 1 SC in next 2 stitches, 2 SC in next stitch, repeat form * (24 stitches) and so on.

Or, you can be like me and just make it up as you go, increasing as necessary to keep the piece flat. If the work is curling up, you need more stitches in the round. If the work is ruffling, you can either take it apart and not increase as many stitches, or do a round with no increases, sort of to bound the problem. I also tried to alternate where I made the increases so as to keep a circle shape. I’ve noticed that if I increase in the same spot each round, I end up with a polygon instead of a circle because of the bulge that extra stitch makes.
When you run out of a particular shirt, tie it to the next shirt with a small knot and keep going. When you’ve come to your desired size, or to the end of your t-shirt
stockpile, pull the end through the last loop and pull tight. Then
weave in your ends.
No comments:
Post a Comment