Fused Plastic Messenger Bag
I made a fused plastic and nylon yarn messenger bag
last summer to carry all of my stuff at a craft fair. It was really
fun to make, but there were some design problems with it. Fused plastic
is really lightweight. Nylon yarn is deceptively heavy. If you machine
sew fused plastic with a straight stitch, you create a perforated seam
that tears out fairly easily when pulled on. Nylon embellishments will
pull on any edge they're attached to. And one day at the craft fair was
enough for the sides of that bag to become compromised. That is a
TERRIBLE feature in a lovingly handcrafted bag.
So I've improved it! This version is never going to fall apart on you.
You'll have to take a pair of scissors to it to get it to tear. I've
made it convertible, so you can carry it as a messenger bag, or a
shoulder bag. It is not as fancy as the other version, but I will tell
you how you can add decorative elements to make it as fancy as you like.
For now, though, I'm going to show you how I made the basic bag.

Fused Plastic Convertible Messenger Bag
approximately 14" wide by 12" high
Supplies:
3 sheets of fused plastic (9 plastic grocery bags)
approximately 40 yards of plarn (5 plastic grocery bags)
Size N crochet hook
2 large dog leash clips (I found them in the purse-making section of my local craft store)
14" non-separating sport zipper
Wonder Clips (by Clover. They're optional, but you can't use straight
pins to hold the fused plastic together because it makes holes that
can't be repaired. The Wonder Clips hold the pieces together without
making holes. If you think you're going to do a lot of work with
plastic, they are well worth the purchase)
Sewing machine and thread
Scissors

(make 2)
Using the plarn and N hook, ch 11
R1: sc in 2nd ch from hook, sc in each ch across (10 st)
R2-3: ch 1, sc in each st across (10 st)
Don't fasten off.

Slide one of the dog leash clips onto the strip, and fold strip in half, matching the short ends. Crochet the ends together, using 4 sc stitches. Fasten off. Don't weave in the ends. Tie the starting and finishing ends together in a knot. Trim the ends if desired.

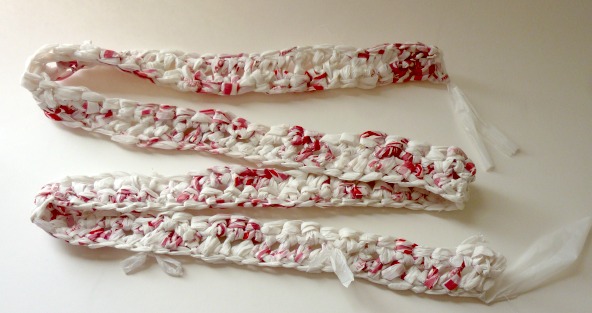
Strap
ch 76
R1: sc in 2nd ch from hook, sc in each ch across (75 st)
R2: ch 1, sc in each st across (75)
Fasten off.
Making the bag
Cut two of the fused plastic sheets to make two 15" x 13" rectangles. These will be the main body of your bag. The 15" sides will be the top and bottom. Determine how you'd like your bag to look by experimenting with which side of the fused plastic (more ink showing through, or less ink showing) and which direction you'd like the writing/logos to be facing.
Take the piece that you'd like to use as the front of your bag. Line the zipper up with the top edge, making sure that the plastic sheet overlaps the fabric side of the zipper. Clip the zipper in place. Sew the zipper to the top edge of the plastic sheet, using a wide zig-zag stitch.

Repeat on the other side of the zipper to attach the back of the bag. You may to unzip the zipper so that you can clip it in place along the center section of the zipper.

Cut a 13" x 10" rectangle out of the last piece of fused plastic. *All of the scraps can be recycled anywhere that you recycle plastic bags*
This piece will become the front flap of the bag, so it's is a perfect opportunity for you to use a piece of fused plastic that you really like the logo on, or one that you've added words to.

Clip the front flap to the back of the bag, approximately 1" below the zipper. Sew in place, using a wide zig-zag stitch.

Now it's time to put the bag together! Grab your side tabs and Wonder Clips!

Fold the bag together, right sides facing. Clip the sides together, matching the lower corners (because we're working with fused plastic, and not fabric, this may be challenging, even if the rectangles were exactly the same size to begin with. Adding the zipper may have thrown things off a little).
Sandwich the side tabs in between the two layers of plastic, making sure that the clip end is in and the crocheted end sticks out slightly. Place it as near the top of the bag as possible, right up next to the zipper. Open up the zipper at least half way across the bag, so that you will eventually be able to turn the bag right side out again. :D

Using a wide zig-zag stitch, sew all the way around the bag. Be very, very careful not to catch the front flap in your seam!
While it is still wrong sides out, flatten the lower corners into triangles. Make a mark across the triangles where it measures 2" across.

This is the only time it's okay to use a straight stitch on this bag: sew across the mark you just made. Snip the excess plastic off to neaten the edge.

Now you can turn it right side out! If you caught the front flap in one of your seams, carefully cut it away from the seam, and it should still look all right. You can now attach the strap to the side flaps, by clipping through the stitches at the end of the strap. This makes it incredibly adjustable!
 |
| Full Length strap |
Or, if you'd like to use your bag as a shoulder bag, you can clip both
ends into one clip, and then loop the center of the strap through the
other clip. Convertible awesomeness!!

You may want to round the corners of your front flap at this point, like I did. You can use the edge of a plate to help make that curve perfect, or you can just wing it. It's completely up to you. If you would like to add a crochet edge to the front flap, I would highly recommend using the technique I used in THIS post to add the crocheted flap. I would also suggest that if you'd like to add crochet embellishments, like flowers, to the front flap, don't sew them on. Put a pin on the back and use that to attach them. Yes, it will make small holes, but you will be able to see right away if they're going to catch on things as you go about your day (and those tiny holes can be patched by fusing on another piece of plastic over the top).
No comments:
Post a Comment