With school time just around the corner, I came up with a school craft project that incorporates brightly colored paper. I created fun book covers using the technique called Iris Folding.

Materials:
-Colored paper
-Paper bag
-Glue stick
-Glue
-Scissors


Begin by cutting you bag open, then cut off bottom flap, so that you ahve one large sheet of paper. With printed side up, place book on top and fold down the top and bottom edges of the paper to match the top and bottom of the book.


Fold one end of the paper and slide the front cover of the book into the open end until the edge of the cover meets the fold. Close the book and crease the other end of the paper where the edge of the back cover meets it. Slide the back cover into the open fold. Now the book cover is complete.
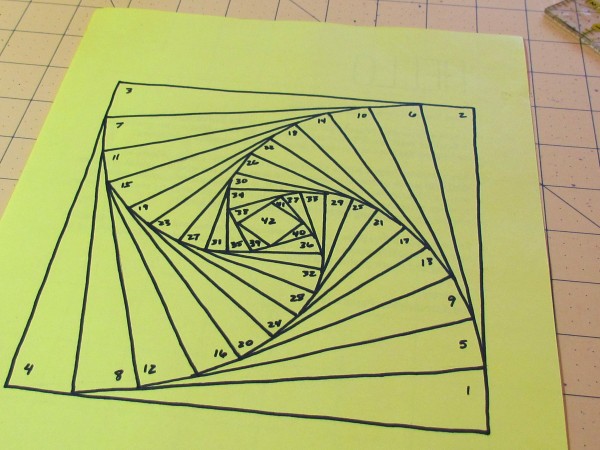
Print off above image http://suzyssitcom.com/iris-folding-pattern-2 If the link doesn't work the pdf can be downloaded here.


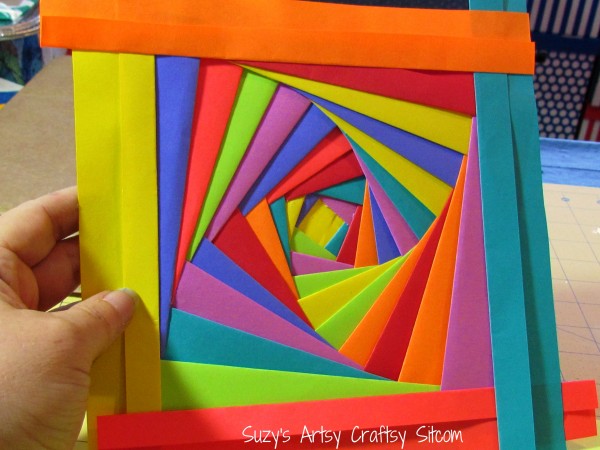
Choose a color and cut a strip of paper that is wider than you numbered section when folded. Fold it lengthwise and place over the section, starting with section one. Be sure the fold is towards the center and facing up. Place folded paper in section 2, tacking the two strips together with a glue stick. Repeat this process around going in numerical order.


Continue around

Final piece is a simple square glued to cover the center.
Flip your project over.
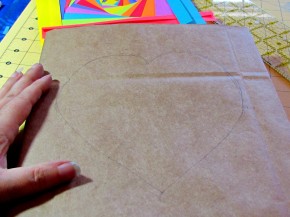
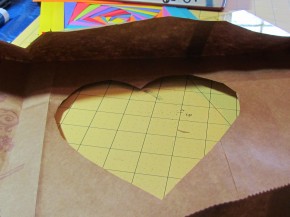
For the heart cover, I drew a heart on the cover of the book that is just a bit smaller that finished Iris Fold. Unwrap the book and cut the shape of the heart out.

Flue the Iris Fold into the inside of the cover using tacky glue with the front side of the iris fold against the inside of the front cover.
No comments:
Post a Comment